


Originally posted November 12, 2019
Updated Nov 1, 2021
As soon as I flipped the calendar to November, I got that warm feeling: it is really fall! Yes, it has been fall for a while now, but here in Orlando it doesn’t quite feel like fall when you are sweating while setting out your pumpkin decor. When the weather drops a few degrees is when I really feel like cranking up all the seasonal fun. Of course that includes some baking, pumpkin pureeing, and fall kids crafts so we can all share in the excitement together.
The first craft we are making together are these beautiful leaves that we strung on yarn to create a garland. Doesn’t the sun shine through just perfectly?
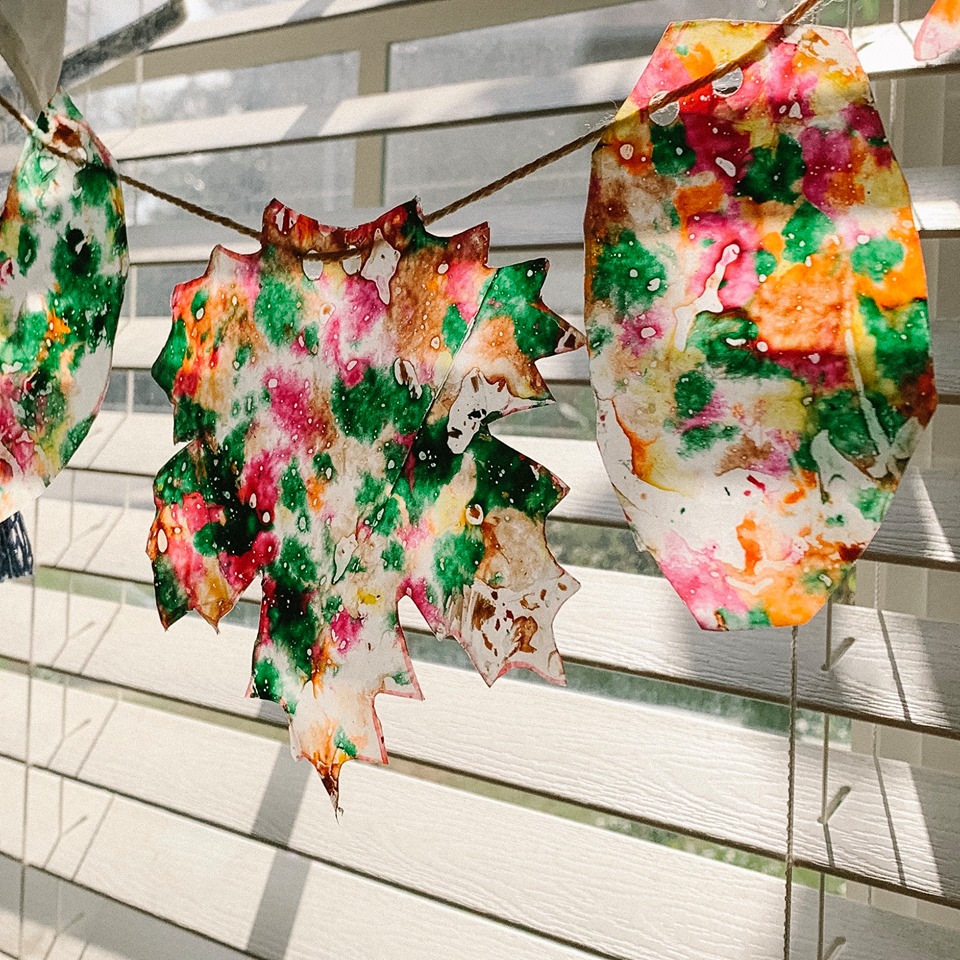
It has really added a festive touch to the room! And it was so simple even the two year old helped. Here are the super easy supplies and steps.
Supplies
- Wax paper
- Crayons in fall colors
- Iron
- Scissors
- Yarn
- Pencil or crayon sharpener
- Thin cotton cloth (optional, to use between iron and wax paper)
- Hole punch
Steps
- Cut two sheets of wax paper in the same size. You will be layering these sheets, so two pieces of paper will make one finished product to cut leaves out of. My pieces were about 24” long, but it depends on how many leaves you want to create.
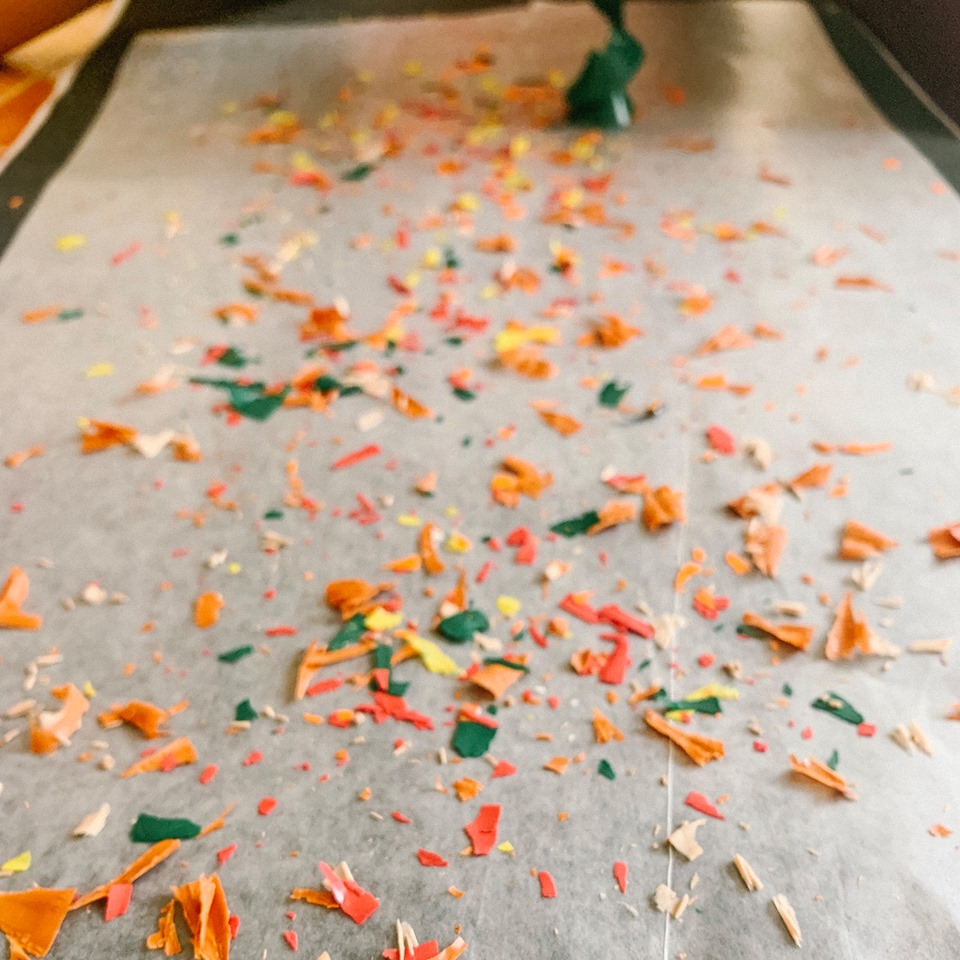
- Sharpen your crayons and capture the shavings. This is a great part for the kiddos to help complete! My five year old sharpened directly onto the waxy side of one of the wax paper sheets. My two year old sharpened into a little bowl and then he helped sprinkle the shavings onto the wax paper. Try to cover all the space so that there are no blank areas (you can see ours have some blank spaces, which is totally fine but will have different results). You can mix all the colors together or play with different patterns.
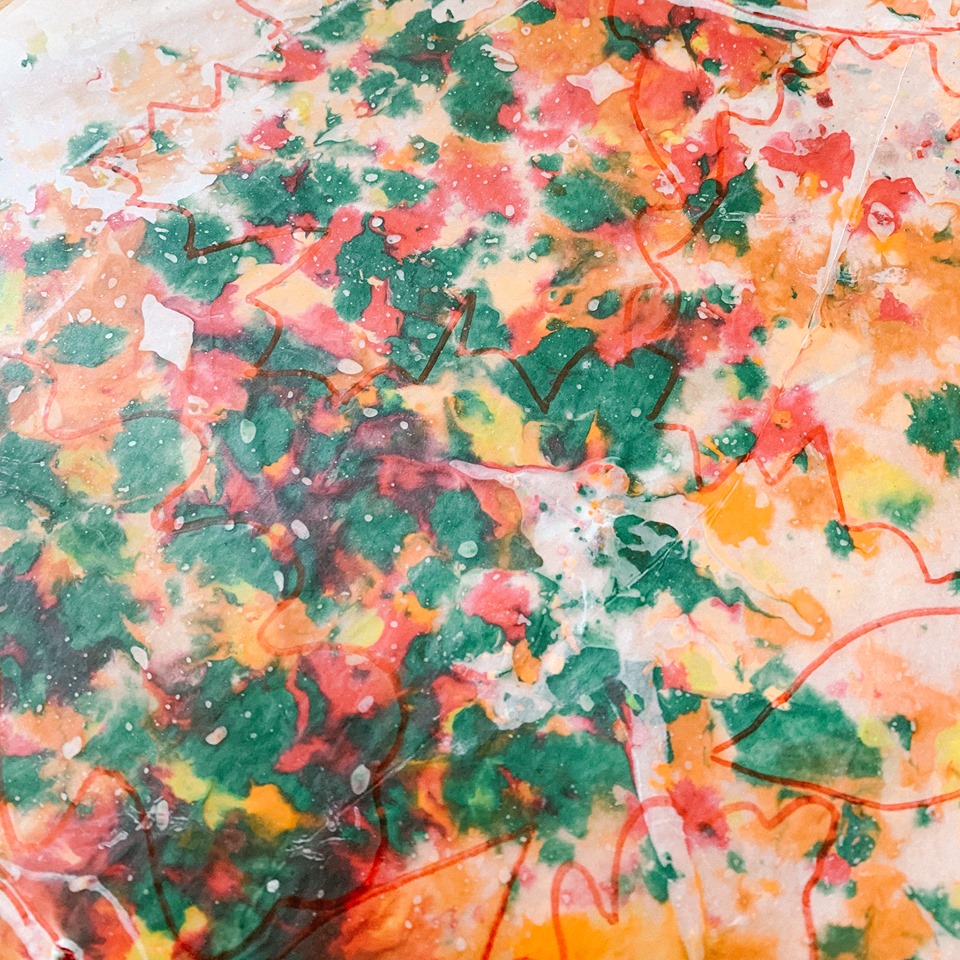
- Carefully lay the other wax paper sheet on top with the waxy side facing down. Use your iron set on the lowest setting to gently melt the shavings between the two sheets. If you are worried about using the iron directly on the wax paper, you can use a thin cloth between. Move quickly, it doesn’t take much to melt them! I found that short soft presses worked better than trying to glide across.
- When all of the wax is melted, let it dry for a minute and harden. Trace leaf designs on the wax paper, cut them out, punch a hole, and string them up!
The effect that these leaves make in front of a window is truly lovely. This is one fall kids craft that you won’t be afraid to display for months to come!

Bonus: Learning Questions!
I found this activity to be a great opportunity to discuss how matter changes forms. These questions will work best for kids in elementary school, but you can stretch them to meet older kids’ levels as well.
- When we sharpen these crayons, how is it changing them? Are the shavings still made from crayon, or are they something new?
- What do you think will happen when we iron over the crayon shavings?
- When we cut the leaves out of the wax paper, is something new being created, or is it the same wax paper with crayon? Is this a physical or a chemical change?


