


Whether you’re months away from your next Disney vacation or stumbling upon this blog while relaxing in the Florida sunshine at your resort of choice, this article will come in handy to ensure you make some quality images of your time here. These five tips will apply to you regardless of what camera you’re using or your skill level. Without further ado, let’s dive in and discover how you can capture the magic at Disney!
1. Maximize your images by playing to your camera’s features
Phones
If you’re using a phone, check out apps like ProShot to expand your camera’s potential. It will allow you to shoot in Manual mode and Shutter priority so you can capture the spinning motion while on Dumbo, Prince Charming’s Carousel, or the Mad Tea party. It also has different display options to help you better compose your images.
Point-and-Shoot
If you have a point-and-shoot camera you’re carrying, you can use built-in modes to help the camera make the right decision for what you’re trying to accomplish. Most point-and-shoots today will allow you to choose automatic “scene” modes that give preference in the following ways:
- Portrait: shallower depth of field to give a more blurred background
- Landscape: greater depth of field to get as much of what you’re taking a picture of in focus
- Night: slows your shutter and ups your ISO to include more of the background
- Sports: prioritizes shutter speed to keep the moving subject sharp
- Backlighting: depending on your camera it may use your flash to fill in shadow areas of the image or it will compensate the exposure reading to lift the shadows
Amateur/Professional Cameras
 “Fancier” cameras that include SLRs, DSLRs, and mirrorless will usually have the options to go semi-automatic and full manual. I always shoot Manual and encourage you to try it, if your camera allows, but only if you’re comfortable with managing all aspects of exposure. If not, semi-automatic modes are a great place to turn! They usually are listed as “A” (aperture priority) and “S” (shutter priority) on the camera.
If your depth of field is important to you, turn it to “A” and select a lower number for a more blurry background or a higher number to get more in focus. Keep in mind, the higher the number (smaller the aperture) the less light you are letting in. If you are in an already dark situation, this might mean your image will end up almost black.
If capturing or eliminating motion is most important, turn it to “S” and choose the right setting for what you want. A faster shutter will stop motion (usually 1/250 of a second or faster, which may display on your camera as 250). A slower shutter will help to capture some motion blur. When I’m on rides that spin, I like to start at 1/60th of a second and slow it down more if needed. Remember, the larger the number you select for “S,” the faster the shutter speed.
2. If the moment is still going on, adjust your composition
Nothing ruins a good picture more than distracting background elements or bad angles. Here is a list of common mistakes people make:
Lines: horizons, light poles, tree branches and others intersecting or appearing to come out from your subject’s head or joints.
Too Bright: your background is brighter than your subject (distracting your viewer from what’s important).
Blending: your subject is wearing the same color or is in the same light as a very busy background causing him or her to blend in.
To fix these mistakes, you have to catch the issues before the moment ends. Move your body to a higher or lower angle to remove the distractions from the frame or to avoid intersecting lines with the subject. Shooting from a lower angle is usually an easy way to remove large Disney crowds.
If your subject is blending into the background or it is too bright behind them, move them to a better spot. You could also turn them another direction so that the light makes them the focus and they stand out from what is behind them.
If you want to learn more about strengthening your compositions, I go into more detail in this blog post: Five Rules of Composition
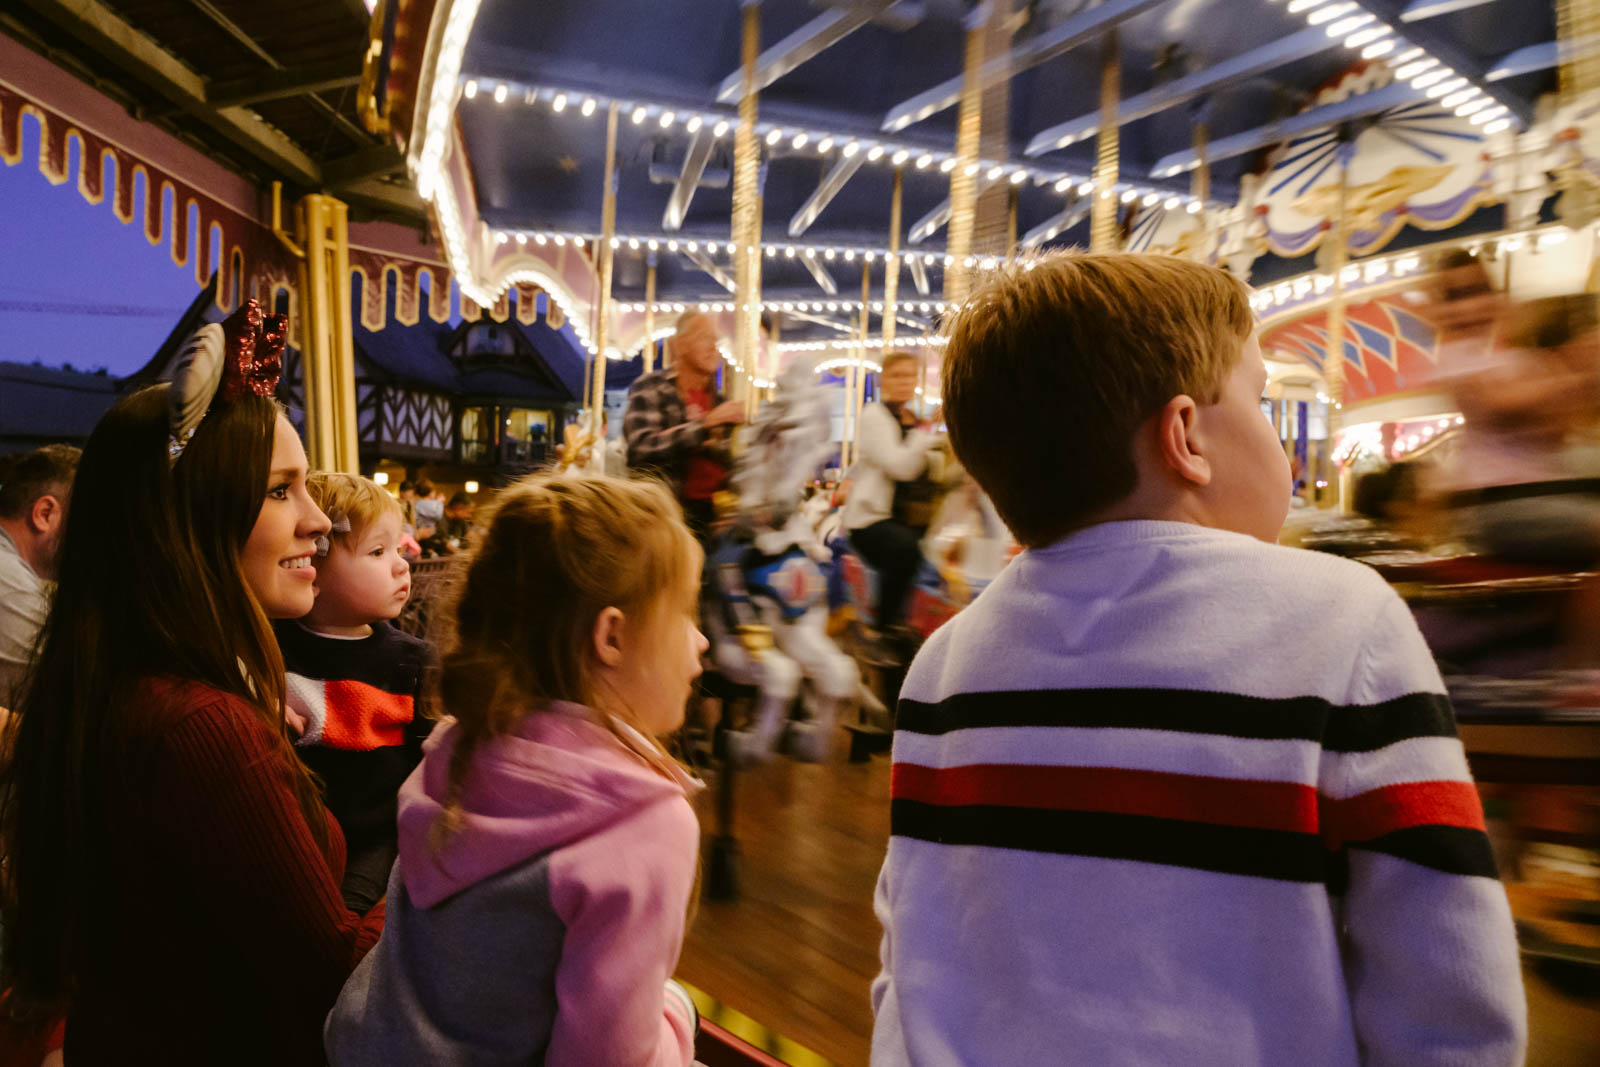
3. Some places are better than others for your camera
As a photographer that follows the rules about flash photography in the parks, you have to know how your camera handles low light and where you can capture better quality images. If your goal is to capture the attractions themselves, Disney has done you a favor and has properly lit everything so that your camera can capture a nice image without flash. At night, the scenic areas of the park usually give off enough light that you can even capture the people most important to you without flash.
Best Indoor/Night Attractions
Here is a list of indoor attractions where you can take pictures of people experiencing the ride without flash (it includes some covered outdoor ones that photograph nicely at night too):
- Disney Character meet-and-greets, though I encourage the Memory Maker package
- Mad Tea Party
- Prince Charming’s Carousel
- It’s A Small World, last room is brightest
- Dumbo playground area
- Journey into Imagination with Figment
- Living with the Land
- Star Wars: Rise of the Resistance
- Toy Story Mania
- Alien Swirling Saucers
I do attempt photos on other indoor rides, but they are a lot harder to get people’s reactions and usually still result in a pretty grainy image. It never hurts to try. All of the outdoor ones are fabulous to try to make a picture on during the day.
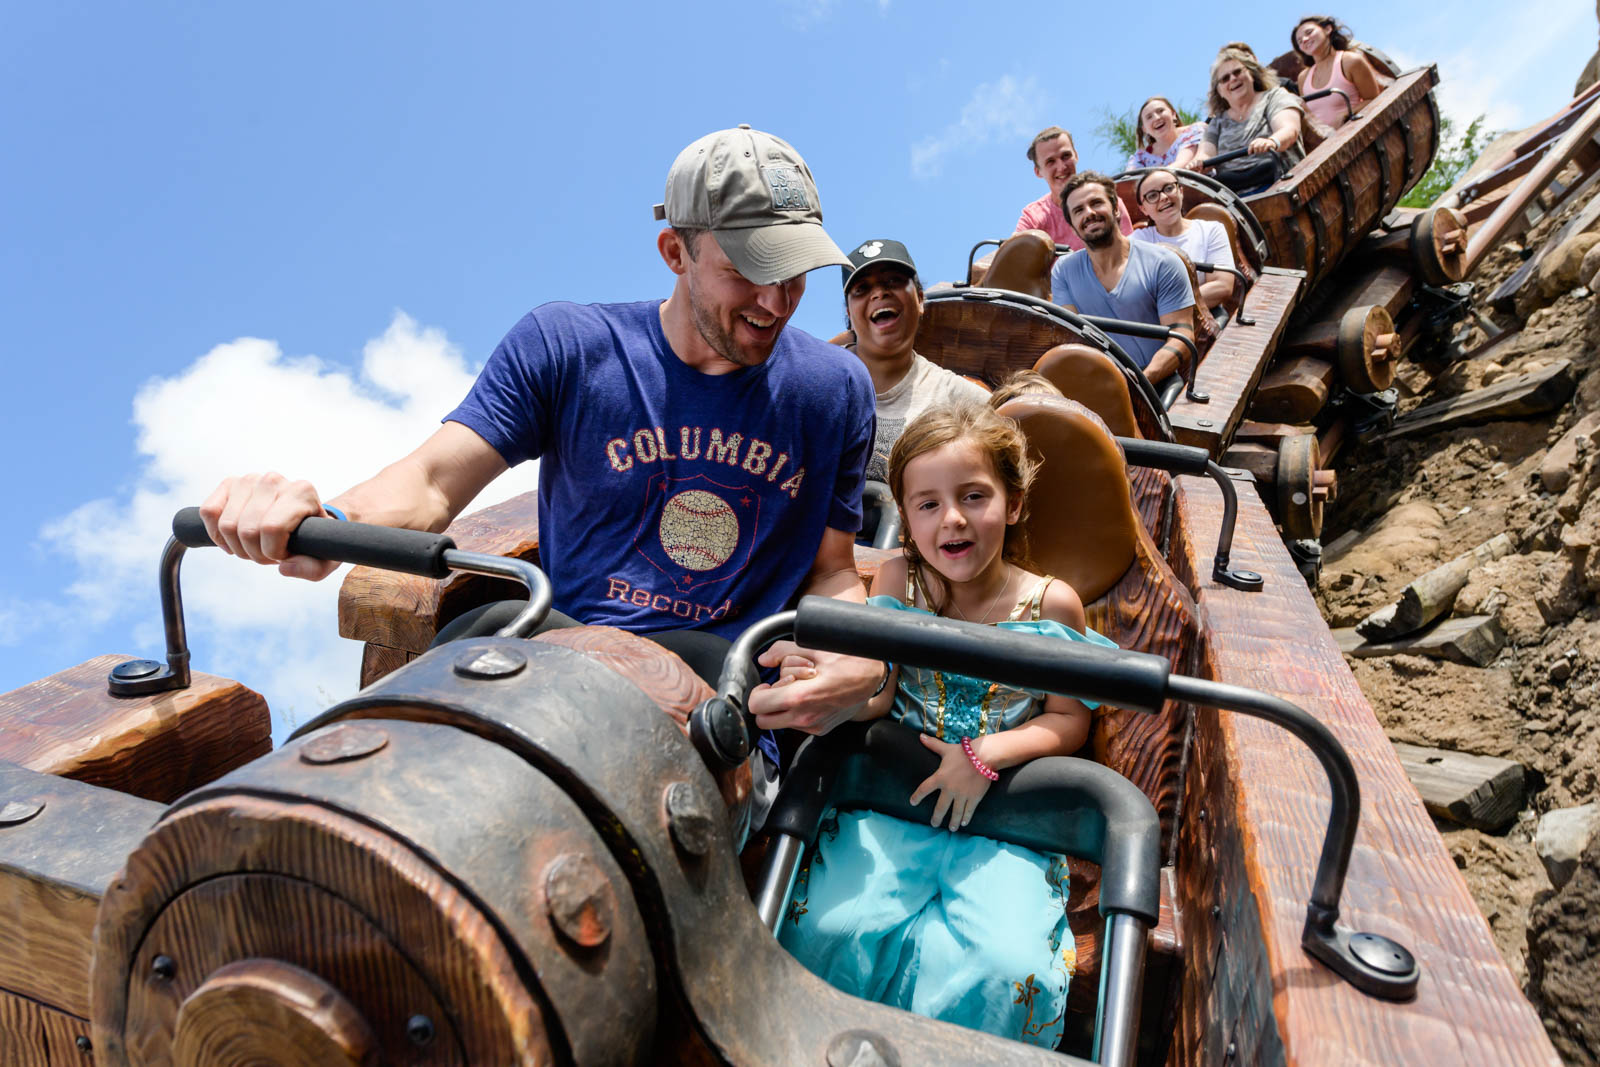
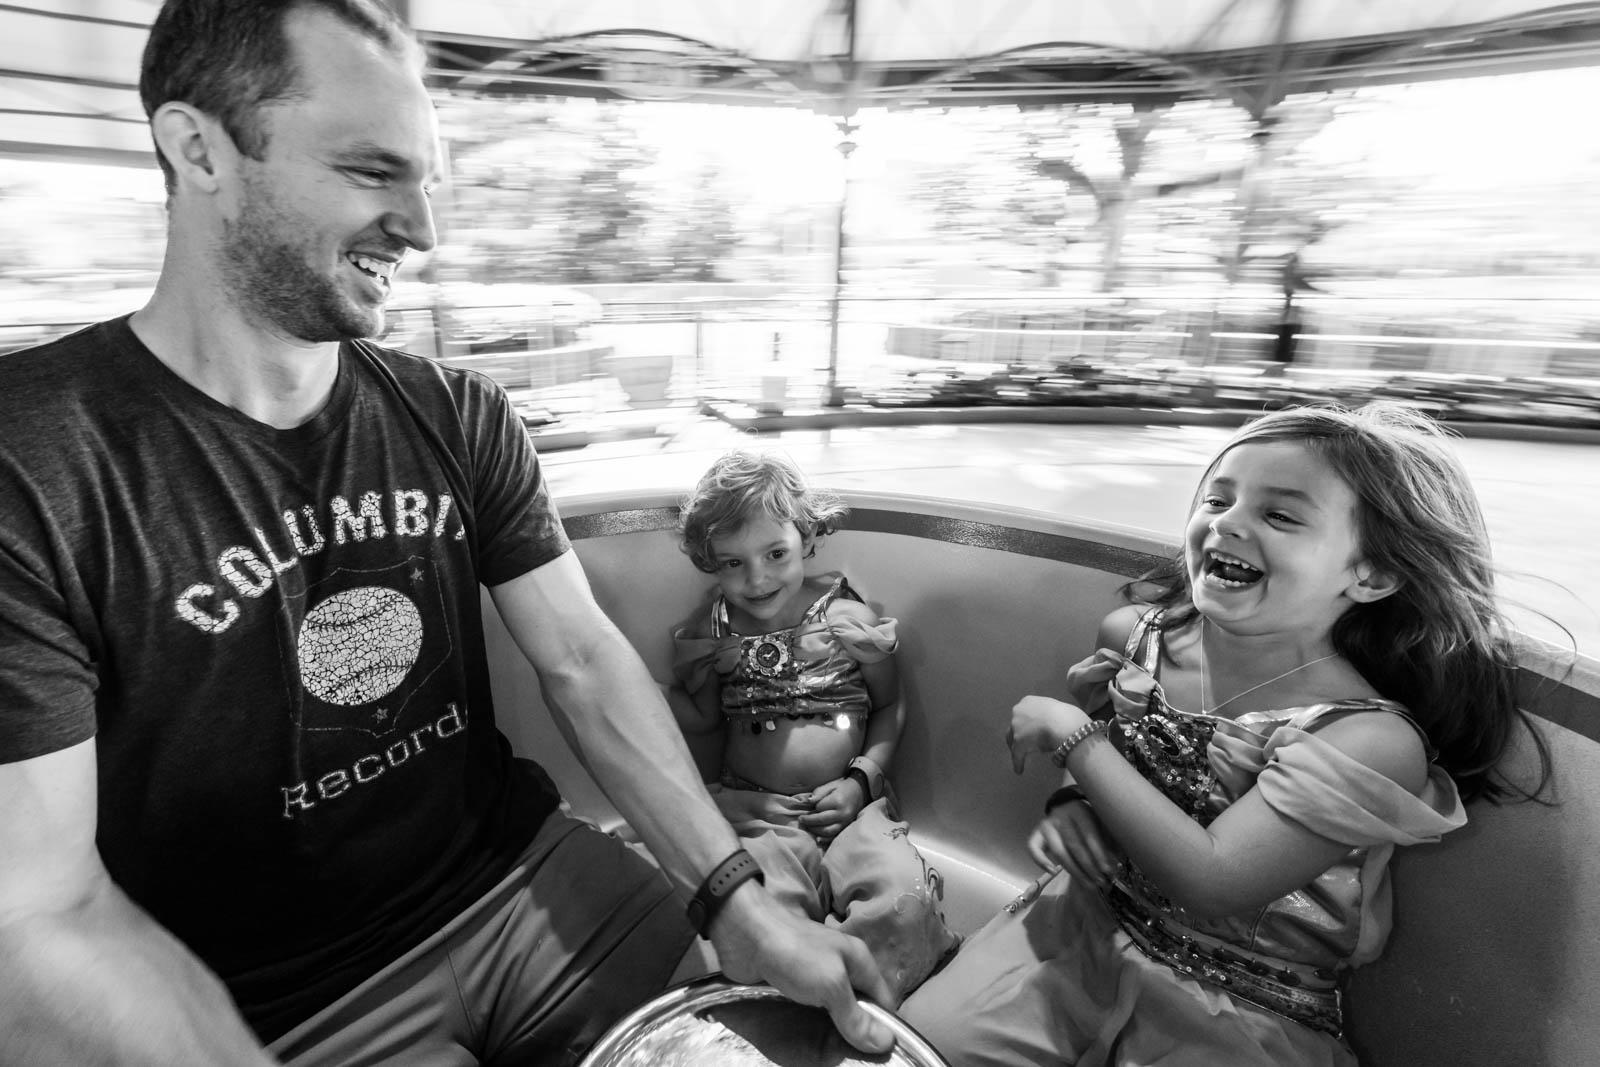
4. Keep a steady hand and a strong stomach
Safety First
 Please use caution when using your camera on rides, especially the faster attractions. I use a long camera strap around my neck and also wrap it around the wrist holding my camera to ensure it stays connected to me on the ride. When possible, the camera is tucked tight into my body. This not only helps to secure it more, it also helps steady the camera to limit motion blur caused by the camera moving while the image is being made.
Limit Dizziness
On Disney rides that spin, it is very easy to get nauseous- even when you aren’t taking pictures. I’ve found it helps to keep my eyes locked on the frame and not the world outside of my viewfinder. If you are using a phone or camera that allows you to compose the image on an LCD screen, keep both eyes on the screen. If you’re using one that requires one eye up to the viewfinder, close the other eye and keep your camera up to your face.
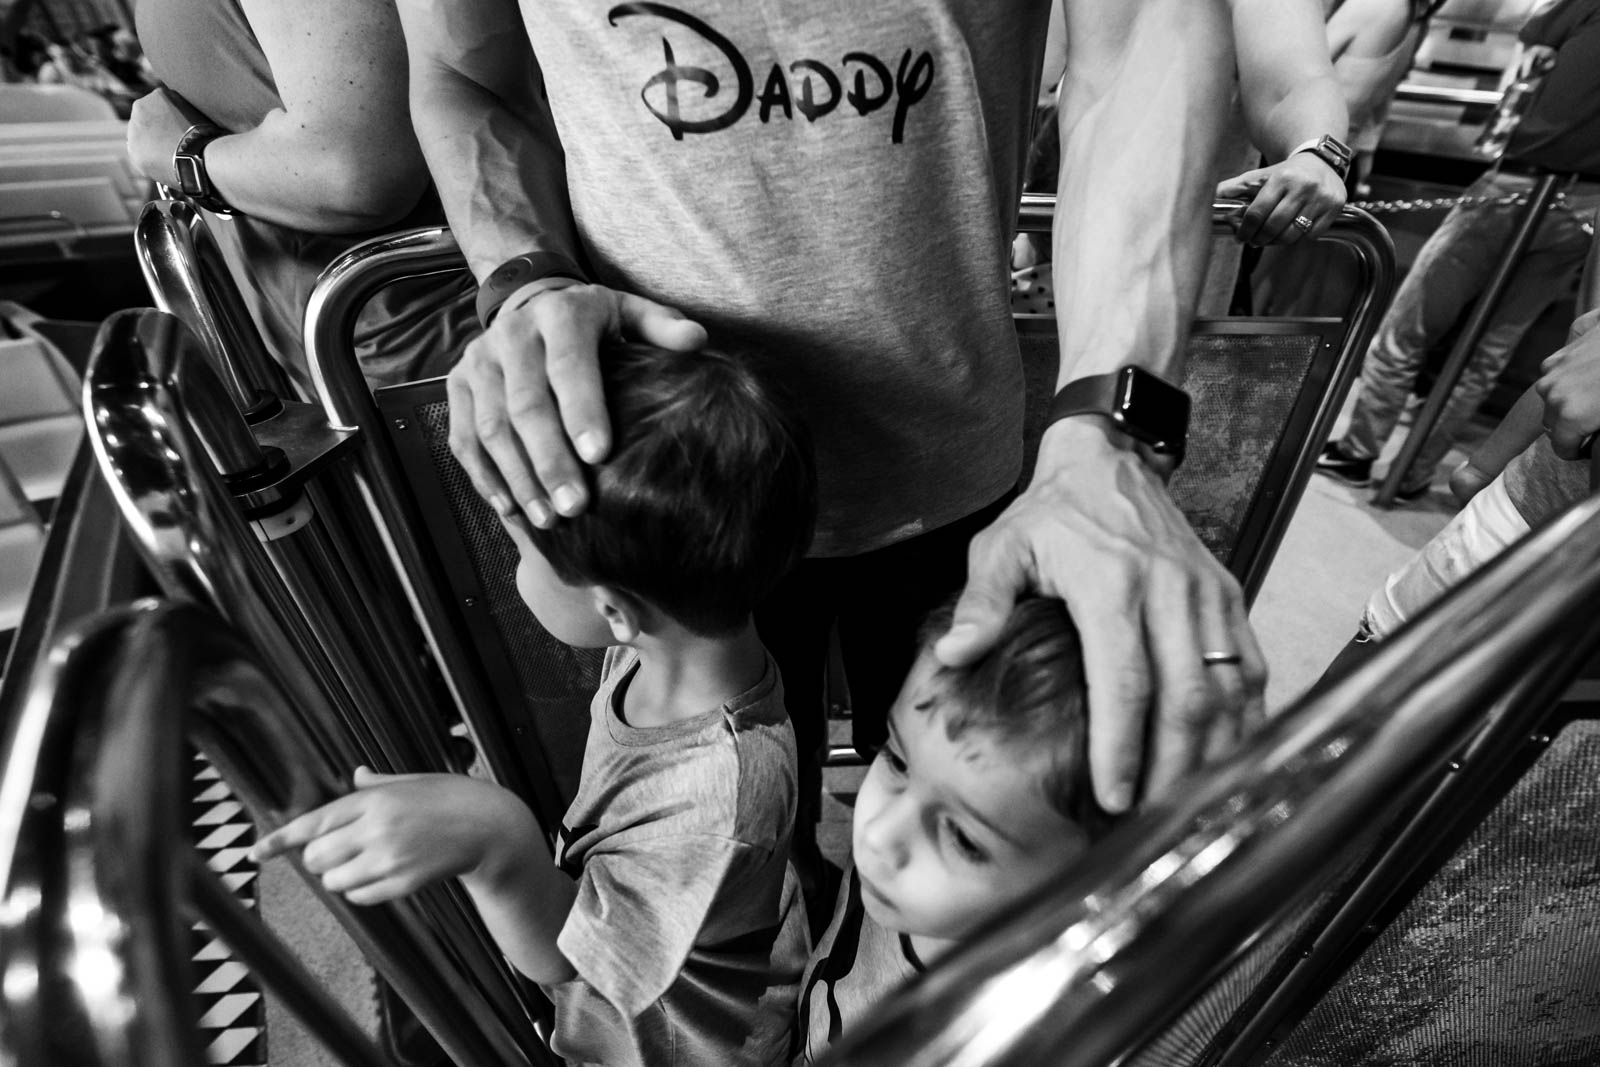
5. Capture what it feels like and not just what it is
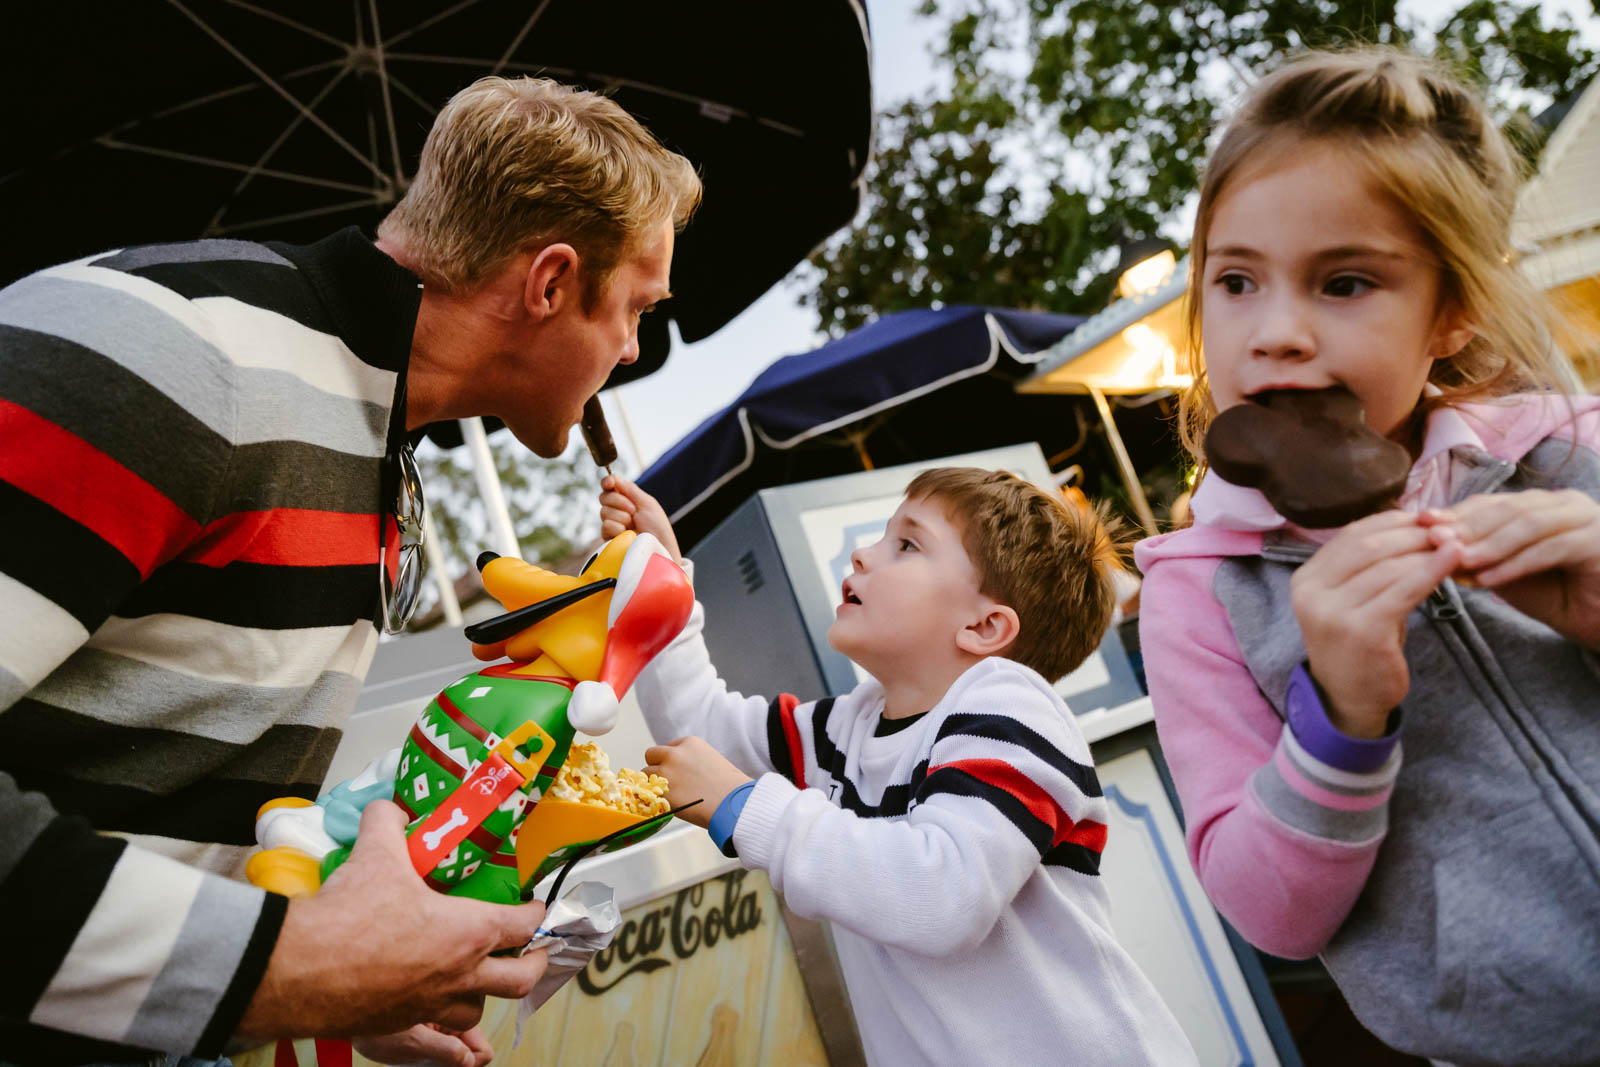 I specialize in documentary family photography. My goal for the images I make is to put the viewer in the moment instead of just seeing that moment frozen in time. To do this, I keep a couple of things in mind that I know to be true about how we see:
Get in Close (physically, not by zooming in)
The closer I am to the action as the photographer, the more the viewer will feel part of the moment. I like to work with a wide lens in the parks, especially for rides where we are sitting together. Do be mindful of any distortion your lens might have along the edges of the frame at these focal lengths. If your camera lens carries a lot of distortion along the edges, keep your subjects more towards the center of the frame.
Fluid Eye Movement
How your viewer’s eye travels through an image can be the difference between a successful image and one that falls flat. This can be achieved using composition and/or motion blur techniques. You want to give the eye a clear path through the image and a nice resting place on the most important subject matter in the image.
What Do You Want to Say?
You’ve decided to take an image of a particular moment for a reason.
Subject vs. Subject Matter
The subject of your image is why you took the picture. The subject matter are the people or things in the image that help explain your why. Keep this in mind for the most successful composition.
 When looking at a moment playing out before you, what do you see? Is it that your child is showing a personality trait that you know will be there decades from now? Maybe what’s happening is particular to this stage of life? Or, could it be a first time experience where the reaction is most important?
What needs to be in the picture?
Once you have answered the “why” you can decide what is necessary in the frame to tell that story. This goes further than just removing distractions from the background. The goal is to keep eliminating things from the frame that aren’t relevant to the story you’re trying to tell until you have gone one too far.
For example, some images require all of mom or dad being in the frame with a child, while others are better served only showing a hand reaching to help the child. These choices are what make you a different artist from the next person holding a camera. Intention is the only real difference between a snapshot and an art piece.
Now, Make Images!
Thank you for taking the time to read through to the end! I hope you’ve learned a few things and are inspired to make some great images while you’re on vacation.
If you want to learn more about how I can help make sure your vacation memories are beautifully captured, please feel free to email me [email protected] or visit my website https://theinspiredstorytellers.com.
About Stephana!
 I grew up with a camera in-hand as a daughter of a photographer and spent the last decade documenting love stories as co-owner of Sona Photography. As I ventured further along in my own journey, I found that there is so much more to a person’s story leading up to and beyond their wedding day. I truly believe there is more value in the everyday moments than in the forced smiles of standard portraits. An annual family portrait session specifically designed to get you an image for a holiday card will capture what you all looked like that year. A day-in-the-life session will capture what it feels like to be your family at this stage in your lives together. A vacation session will allow you to live in and for the moment with the people you love most, without the worry of having these memories saved forever. For all these reasons and more, I started a studio focused on delivering beautiful, authentic, real moment imagery that you will want to print and proudly share for generations to come.


Great article! My family and I are going to Disney this summer. My eldest son asks me for a long time to take him there, and my wife also supports his idea, and even the smallest child in the family, who still does not know how to talk, seems to also protest against daddy and demands a trip to Disney)) Since I usually work as photographer in our family, and all my family members are always dissatisfied with my pics, your article was incredibly useful to me) So thank you very much for the valuable tips! I will definitely try them during our trip in the summer.
I’m so glad I could help! It’s a tough job always being the one behind the camera – hard to both enjoy a moment and capture it at the same time. Plus, you’re never in the pictures! Disney’s Memory Maker is a great way to put the camera down and make sure you can take home pictures of the entire family in them from around the park. I’m also here, if you decide you want to fully relinquish camera duties at least for one day!