


Photos, original art, framed posters, and art prints are lovely additions to your home to add a touch of style. Wall decor also functions as a focal point and serves as an icebreaker when family or friends visit your home. Whatever wall art you choose for your home, make sure it’s properly positioned.
Before driving into your wall, there are a few things to know such as the type of hardware to use, choosing the right height, and finding a wall stud. Remember that planning ahead of time is worthwhile because it’ll save you the trouble of drilling unnecessary holes in the wall, which is a costly mistake in terms of time and money.
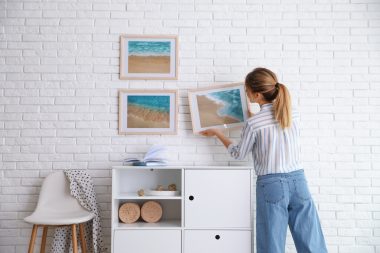
Here are some helpful hints for hanging photos or canvas prints properly on your wall like a pro:
Choose A Style That Complements The Type Of Wall You’re Working With
The type of wall where you’ll hang your photos impacts the type of hardware you need to use. You must use a specific anchor, nail, or drill bit for the type of wall you have, whether mortar, brick, or plasterboard.
Arrange The Photos To Get The Best Effect
How you arrange the photos or framed prints can make or break the attractiveness of the display you want to achieve. You can go for symmetry or asymmetry, but make it a point that all the frames are evenly spaced to avoid a haphazard arrangement. If you plan to hang several pictures at a time, use a tape measure.
Determine The Frame’s Weight
A heavy picture might fall and leave a pile of shattered glass on the floor below it if you’re not careful. Although photo hangers are usually sufficient for light frames, anything heavier than a paperback book will require an anchor to prevent it from being easily pulled away from the wall.
Match The Size Of The Picture To The Size Of The Wall
If you have an empty wall in one of the rooms in your home, it might be time to give it a facelift. When hanging pictures, one of the basic design rules is to match the picture’s size and scale to the wall’s size. For example, don’t hang a small painting alone on a large wall. A better approach is to assemble a group of pictures to fill up more available space. You can combine colors and sizes to create a collection that truly pops.
Arrange The Photos So They’re At Eye Level
Hanging photos or collages at eye level makes them easier to see. Nevertheless, it’s not as simple as it appears when it comes to photos. If you’re exceptionally short or tall, your eye level might not be the same as most guests. Many make the mistake of hanging small pictures on the upper portion of the wall, which can be unattractive.
Consider The Wall’s Surface
The wall surface where you’ll hang photos is an important consideration. Here are some of the common wall surfaces and considerations to think about:
- Drywall. It’s the easiest material to work on since it allows easy penetration. Hanging directly on drywall won’t provide a secure anchor, so make sure you find a wall stud.
- Plaster. A plaster wall is likely to crumble. Look for a wall stud for a secure anchor. Applying tape on the wall before drilling will keep it from crumbling.
- Brick. If you have brick walls, you’ll need to use a wall anchor. Use a masonry bit to pierce the mortar, not the actual brick.
Choose The Appropriate Hanging Hardware
If you’ve looked at the back of a picture frame, you’ll find a variety of hardware options such as sawtooth hangers, D-rings, and wire. There are even frames that come with more than one option. The suitable one will depend on the method you’re comfortable working with such as:
- Use a nail as a hanger. A single nail is usually sufficient if the frame comes with a hook or sawtooth hanger. Using a nail leaves minimal damage since you’ll create a small hole in the wall. To ensure the best support, drive a nail into a wall stud, but make sure the nail is driven in at an angle.
- Hang it with wire. Hang a photo with a wire suspended between two D-rings on opposite sides for added stability.
- Use adhesive strips or hooks. Consider adhesive-backed picture hooks and strips, especially for light frames, if you don’t want to bother with drilling holes in the wall.
Check The Level Of The Frame
Even if you succeed in placing the hardware or spacing it properly, you may be disappointed if the frame appears uneven. If you’re using a hook and nail to hang your frame, the best way to ensure it’s always level is to distribute the weight on both sides evenly.
Use a ruler to ensure even weight distribution on both sides of the frame. You need to measure to check that your nail is as close to the center of the frame as possible.

Final Thoughts
Pictures on your walls can add a splash of color to your home’s otherwise bland walls. Knowing how to position photographs is essential if you want to transform the interior of your home into an appealing space. By considering these valuable insights on how to hang pictures properly on any empty walls in your home, you’ll turn them into lovely focal points that you can eagerly show off to family or friends who happen to drop by.


